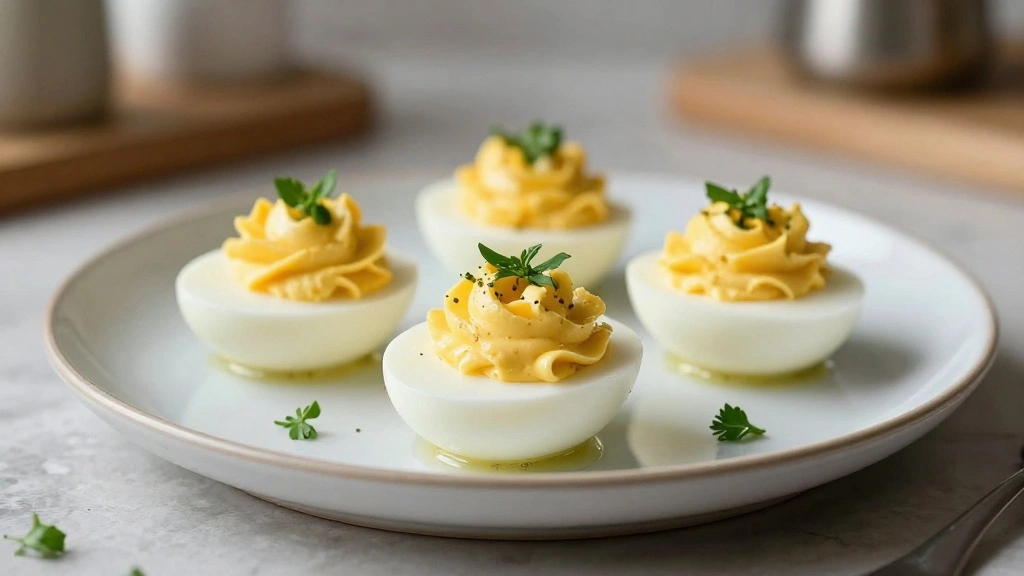
Deviled eggs are a timeless appetizer that blends simplicity with sophisticated flavors.
With their creamy, tangy filling and tender egg whites, they are irresistible at any gathering.
I first encountered this delightful dish at a family picnic, where its ease of preparation made it a perennial favorite.
These deviled eggs are perfect for spring gatherings, offering a burst of flavor that complements the freshness of the season.
Whether you’re hosting a casual brunch or a festive holiday meal, deviled eggs add a classic touch.
This foolproof recipe guarantees perfect deviled eggs every time, with minimal effort.
The History and Cultural Significance
• Deviled Eggs Recipe traces its origins to ancient Rome, where it was originally created by using spices to enhance boiled eggs.
• The dish evolved over decades as new ingredients like mustard and mayonnaise were incorporated, eventually becoming the beloved version we know today.
• In American culture, this dish traditionally appears at summer picnics and holiday gatherings, symbolizing comfort and nostalgia.
• While many variations exist across different regions, the authentic version maintains a creamy, tangy filling that sets it apart from imitations.
Recipe Overview
Nutritional Information (per serving)
Essential Equipment Guide
Medium Saucepan: Essential for boiling eggs evenly, ensuring they are cooked through without overcooking. A heavy-bottomed saucepan distributes heat more evenly. Alternatives include a deep pot that can hold a single layer of eggs.
Slotted Spoon: Important for removing eggs from boiling water without cracking them. A ladle can be used as an alternative if handled carefully. Look for a spoon with a long handle for safety around boiling water.
Piping Bag: This tool helps achieve a professional look for the egg filling. Alternatives include a plastic sandwich bag with a corner cut off. For best results, look for a piping bag with various nozzle sizes.

All-in-One Piping Tips Set - Includes a reusable piping bag, 6 large piping tips, coupling, cleaning brush and storage container for easy decorating and efficient organization. A staple for any occasion!

Riccle Piping Bags and Tips Set, 11.8 Inch 100 Anti Burst Piping Bags, 124 Pcs Cake Decorating Kit with 16 Piping Tips, 1 Reusable Pastry Bags, 3 Cake Scrapers

PROFESSIONAL SILICONE PASTRY BAGS: Compared with others,ELK's piping bags uses the 60HA elastic silicone, which is the perfect material for the piping tips set. The slight elasticity ensures its reusability, allowing the viscous liquids to flow smoothly inside. It won’t blow out even if you knead the thick batter with it. Its high stretchiness means that all of the squeezing efforts you make gets transferred to bulging sides as it stretches out, instead of forcing the frosting out the bottom.
Ingredients
For the Base
|
| Amount | Ingredient | Notes |
|---|---|---|
| 6 large | eggs | hard-boiled and peeled |
For the Filling
| Amount | Ingredient | Notes |
|---|---|---|
| 3 tablespoons | mayonnaise | adds creaminess |
| 1 teaspoon | Dijon mustard | provides tangy flavor |
| 1/2 teaspoon | white vinegar | adds a hint of acidity |
| 1/4 teaspoon | salt | enhances overall taste |
| 1/8 teaspoon | black pepper | adds mild heat |
Garnish
| Amount | Ingredient | Notes |
|---|---|---|
| 1 teaspoon | paprika | for color and mild spice |
| 1 tablespoon | fresh chives | finely chopped, for a fresh finish |
Preparation Methods
Perfect Hard-Boiling: Place eggs in a single layer in a saucepan and cover with cold water by an inch. Bring to a rolling boil, then remove from heat and cover. Let stand for 10-12 minutes, then transfer to an ice bath to stop cooking. This method ensures evenly cooked eggs with firm yet tender whites.
Egg Peeling Technique: Gently tap the egg on a hard surface and roll it under your palm to crack the shell. Begin peeling from the wider end where the air pocket is located. Peeling under running water can help remove stubborn pieces.
Smooth Filling Creation: Mash yolks with a fork before mixing with other filling ingredients. Ensure all lumps are removed for a smooth texture. A food processor can be used for a creamier filling if desired.
Step 1: Prepare Ingredients

Gather all necessary ingredients and equipment.
Ensure eggs are fresh and check that all ingredients are readily available.
Read through the entire recipe before starting to familiarize yourself with the steps.
This will help streamline the cooking process and avoid any surprises.
Step 2: Boil the Eggs

Place eggs in a medium saucepan in a single layer.
Cover with cold water, ensuring water is at least an inch above the eggs.
Bring the water to a rolling boil over medium-high heat.
Once boiling, remove from heat, cover, and let sit for 10-12 minutes.
Step 3: Cool and Peel the Eggs

Transfer boiled eggs to a bowl filled with ice water.
Allow eggs to cool completely, approximately 5 minutes.
Gently crack the shells and peel under running water.
Ensure all shell fragments are removed for a smooth finish.
Step 4: Halve the Eggs

Carefully slice each peeled egg in half lengthwise.
Use a sharp knife for clean cuts and minimal tearing.
Gently remove yolks and place them in a small mixing bowl.
Arrange egg whites on a serving platter, cut side up.
Step 5: Prepare the Filling

Mash egg yolks with a fork until crumbly and smooth.
Add mayonnaise, Dijon mustard, vinegar, salt, and pepper.
Mix thoroughly until the filling is creamy and well combined.
Taste and adjust seasoning if necessary.
Step 6: Fill the Egg Whites

Transfer the filling into a piping bag or plastic bag with the corner cut off.
Pipe or spoon the filling into each egg white half.
Ensure each egg is generously filled with the yolk mixture.
Smooth the tops with a spatula for a professional look.
Step 7: Garnish the Eggs

Sprinkle paprika evenly over the filled eggs.
Add finely chopped chives for a fresh burst of color and flavor.
Ensure garnishes are evenly distributed for visual appeal.
Wipe edges of the platter clean for a tidy presentation.
Step 8: Serve and Enjoy

Chill the deviled eggs in the refrigerator until ready to serve.
Arrange on a serving platter or individual plates.
Present with additional garnishes, if desired, such as parsley.
Enjoy your beautifully prepared deviled eggs with guests.
Critical Timing and Temperature Guide
Boiling Eggs: Heat water until it reaches a rolling boil, then remove from heat and cover. Eggs should sit for exactly 10-12 minutes for perfect doneness. Overcooking can lead to a green ring around the yolk, indicating sulfur reaction.
Cooling Eggs: Transfer immediately to an ice bath to halt cooking. Cooling should last at least 5 minutes to facilitate easy peeling. Insufficient cooling results in difficult peeling.
Chilling Filled Eggs: Once filled, refrigerate eggs for at least 30 minutes to set the filling. Serve within 4 hours of chilling to maintain freshness and texture.

This egg timer will take the guess work out of boiling eggs! As the timer heats up, the red face changes color, indicating soft, medium, hard and stages in between, absorbing heat exactly as an egg does. The result is the perfect boiled egg!

Premium Nontoxic Heat Resistant - 100% bpa Free, no BPF and made of durable Food-Safe and Non-toxic Polyresin. The egg timer complies with the most rigorous safety standards and completely safe for kids and adults.

Say goodbye to the worst time making hard/soft boiled eggs! Our creative egg timer for boiling eggs calculates cooking stages precisely by temperature to help you boil an ideal hard/soft boiled egg.
Pro Tips for Deviled Eggs Recipe
• Ingredient Selection: Choose farm-fresh eggs for the best flavor and texture. High-quality mayonnaise makes a significant difference in the creaminess of the filling.
• Preparation Secret: For a fluffier filling, beat the yolk mixture with an electric mixer for added air and creaminess.
• Temperature Management: Always start with cold water when boiling eggs to prevent cracking.
• Texture Enhancement: Strain yolk mixture through a fine-mesh sieve for the smoothest filling possible.
• Flavor Layering: Add a dash of hot sauce or a pinch of smoked paprika to the yolk mixture for extra depth.
• Make-Ahead Strategies: Prepare yolk mixture a day in advance and store separately from the whites. Assemble just before serving.
• Restaurant-Quality Finishing Touches: Use a star-tipped piping nozzle for a decorative finish on the filling.
• Equipment Optimization: Use a silicone baking mat under the eggs in boiling water to prevent them from cracking.

VALUE FOR MONEY SET: Cake piping bags and tips contains 12 kinds of decoration tips, 2 couplers, 1 reusable silicone piping bags, and 100 disposable pastry bags. The extremely high cost performance allows you to start creating like a professional quickly.

Cupcake injector and decorating set! This kit allows you to not only decorate the outside, but now you can put filling inside your cupcakes!

Cupcake injector and decorating set! This kit allows you to not only decorate the outside, but now you can put filling inside your cupcakes!
Troubleshooting Common Issues
• Filling Too Runny: This is often caused by too much mayonnaise. Gradually add more cooked yolk until the desired consistency is reached.
• Eggs Hard to Peel: Likely due to insufficient cooling. Ensure eggs are fully cooled in ice water before peeling.
• Filling Lacks Flavor: Adjust seasoning by adding more salt, mustard, or a splash of vinegar to enhance taste.
• Eggs Overcooked: Overcooking results in a green ring around yolks. Use precise timing and immediate cooling to prevent this.
• Uneven Filling Distribution: Use a piping bag for precise and even filling placement.
• Egg Whites Tearing: Handle egg whites gently and use a sharp knife to avoid tearing when halving.

【THICKENED 16 INCH PIPING BAGS】- Firstake large piping bag is made of thickened material, that is flexible, strong, reliable and thick enough to withstand pressure of squeezing and frosting without any burst or leakage, you can use it safely.

1. Eco-Friendly & Extremely Durable Silicone Say goodbye to single-use plastics. Crafted from premium, food-grade silicone, these reusable piping bags are engineered to withstand over 500 heavy-duty squeezes without stretching, tearing, or blowing out. It is a sustainable choice that significantly reduces kitchen waste while providing professional-grade reliability for your thickest doughs and buttercreams.

NOT TEAR:The tough pastry bags will solve the problem of cracking the pastry belt, you can stop worrying about the rupture of the piping bag. The reason for durability is the thicker and better material.
Variations and Regional Differences
• Southern Style: Often includes sweet pickle relish and a dash of hot sauce for a sweet and spicy kick.
• French Variation: Incorporates fresh herbs like tarragon and chervil for a refined flavor.
• Mexican Style: Adds avocado and lime juice to the filling, topped with jalapeño slices for a zesty twist.
• Asian Influence: Features soy sauce and sriracha in the filling, garnished with sesame seeds and scallions.

Mixing rich, savory flavor with a touch of sweetness, this relish features a blend of tomatoes, onions, bell peppers, and vinegar, with jalapenos for a hint of spice.

NEVER WATERY, ALWAYS CRUNCHY — The Relish Upgrade Your Hot Dogs Deserve: Tired of runny, soupy relish jars with liquid pooling at the bottom? Slawsa Original stays crisp and spoonable from the first bite to the last, with real cabbage, carrots, and bell peppers that deliver satisfying crunch on every burger, brat, and hot dog. No artificial gums, no cornstarch thickeners — just vegetables that actually hold their texture the way nature intended.

Bold Crunch That Stands Up to Grilled Meats: Unlike soggy, sweet imitations, this topping delivers a crisp, tangy bite with a slow-building kick. Perfect for franks, brats, burgers, and beyond.
Food Science Behind the Recipe
• Coagulation of Proteins: Boiling eggs causes the proteins to coagulate, transforming the liquid egg into a solid state. Understanding this helps in achieving the perfect texture.
• Emulsification: The mayonnaise in the filling acts as an emulsifier, blending the yolk mixture into a smooth, creamy texture.
• Acid-Base Reaction: The vinegar in the filling provides acidity, balancing the flavors and enhancing the overall taste.
Frequently Asked Questions
What's the most common mistake people make when preparing deviled eggs? Overcooking the eggs, leading to rubbery whites and a green ring around the yolks.
How can I make my deviled eggs more flavorful? Add more seasoning or incorporate ingredients like hot sauce or herbs for extra flavor.
Can deviled eggs be made in advance? Yes, prepare the filling a day ahead and store separately. Assemble just before serving.
How do I prevent the egg whites from tearing? Use a sharp knife and gentle handling when slicing and peeling.
What is the best way to fill deviled eggs? Use a piping bag for even and professional-looking filling.
Why should I cool the eggs in ice water? It stops the cooking process and makes peeling easier.
How long can deviled eggs be left out? Serve chilled and consume within 2 hours to ensure food safety.
Serving and Presentation Guide
• Traditional Presentation: Serve deviled eggs on a platter lined with lettuce for a classic look.
• Modern Twist: Use an egg tray with individual wells to prevent sliding and for a clean presentation.
• Gourmet Style: Garnish with microgreens or edible flowers for an upscale finish.
• Casual Gathering: Arrange on a wooden board with small bowls of extra garnishes for guests to customize.
Conclusion
Deviled eggs are a versatile and crowd-pleasing appetizer that never goes out of style.
With this foolproof recipe, you can create perfect deviled eggs every time, impressing friends and family alike.
Give this classic dish a try and enjoy the delightful blend of flavors and textures.
Your next gathering will be a hit with these delicious deviled eggs on the menu.