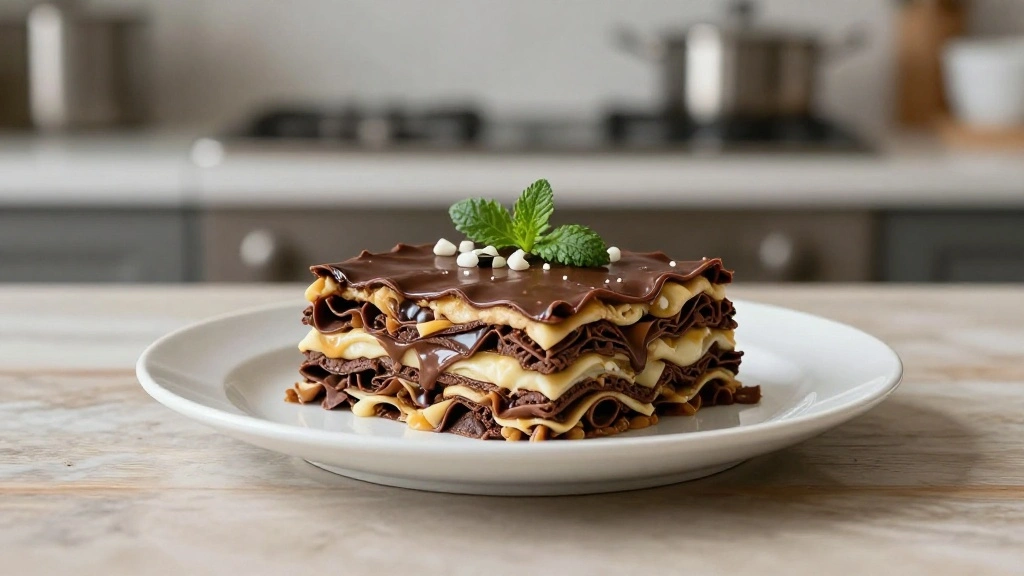
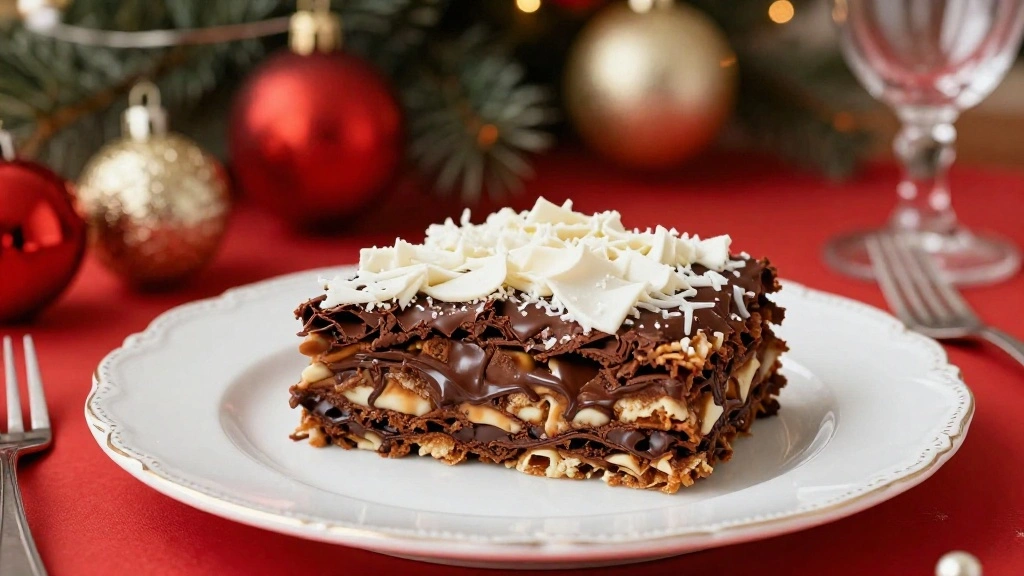
No-Bake Chocolate Lasagna is a decadent dessert that combines layers of creamy and chocolatey goodness.
Its appeal lies in its simplicity and the delightful contrast of textures that tantalize the palate.
I first encountered this recipe during a family gathering, where its ease of preparation and rich flavors made it an instant hit.
With its layers of chocolate pudding, whipped cream, and cookie crust, it creates a symphony of flavors and textures in every bite.
Whether you’re a beginner or a seasoned baker, this no-bake dessert promises impressive results without the need for an oven.
The History and Cultural Significance
• No-Bake Chocolate Lasagna traces its origins to the United States in the 1970s, where it was originally created by home cooks seeking a quick yet impressive dessert.
• The dish evolved over decades as convenience ingredients like instant pudding and whipped topping became more widely available, eventually becoming the beloved version we know today.
• In American culture, this dish traditionally appears at potlucks and family gatherings, symbolizing comfort and togetherness.
• While many variations exist across different regions, the authentic version maintains a layered structure and creamy texture that sets it apart from imitations.
Recipe Overview
Nutritional Information (per serving)
Essential Equipment Guide
Springform Pan: This pan is crucial for creating the defined layers of the dessert and for easy release when serving. Alternatives like a regular baking dish can be used, but the presentation might not be as neat.
Mixing Bowls: Multiple bowls are needed to prepare different layers separately, ensuring a smooth and efficient workflow. Stainless steel or glass bowls are preferred for their durability.
Spatula: A flexible spatula is essential for spreading layers evenly, ensuring a consistent texture and appearance. Look for a spatula with a comfortable grip and flexible head.
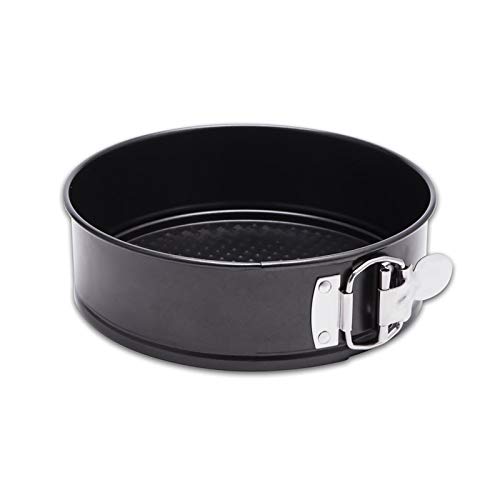
VERSATILE FOR INSTANT POT. Our 7-inch springform pan(diameter: 7inches, height: 2.5inches) is perfect and widely used for instant pot 6Qt or 8Qt pressure cookers. It is an indispensable baking partner in the stove and oven (oven safe to 450℉) , helping you make flawless, delicious food with the right equipment.

FOOD-GRADE HEALTHY COATING: FENSIDEN Springform Cake Pan Set Feature a Premium Food-Grade Nonstick Coating Ensures Easy Release of Your Delicacies. Experience Hassle-free Baking with Fensiden Round Baking Cake Pans
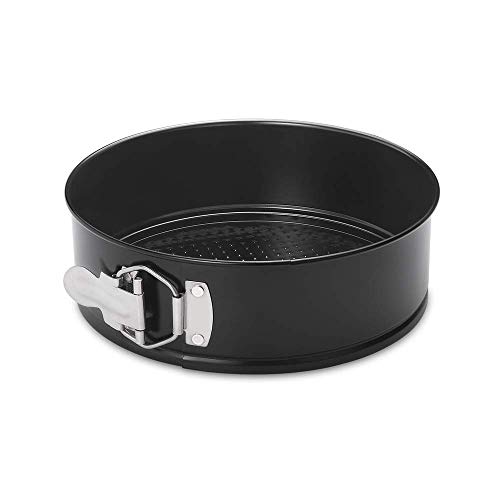
HEALTHY COATING: Our Non-stick coating is a food grade safety coating with no harsh chemicals or hazardous substances. The true double layer coating allows the cake be easily removed without damage. Avoid making it difficult to clean the cake because it sticks to the pan or leaves a lot of cake residue.
Ingredients
For the Base
|
| Amount | Ingredient | Notes |
|---|---|---|
| 2 cups | Oreo cookies | crushed into fine crumbs |
| 1/2 cup | butter | melted, to bind the crust |
For the Chocolate Layer
| Amount | Ingredient | Notes |
|---|---|---|
| 2 cups | milk | whole or 2%, for a creamy texture |
| 2 packages | instant chocolate pudding mix | ensures a rich chocolate flavor |
For the Cream Cheese Layer
| Amount | Ingredient | Notes |
|---|---|---|
| 1 package | cream cheese | softened, for a smooth layer |
| 1 cup | powdered sugar | adds sweetness without graininess |
| 2 cups | whipped topping | folded for a light texture |
For the Topping
| Amount | Ingredient | Notes |
|---|---|---|
| 2 cups | whipped topping | creates a fluffy top layer |
| 1/2 cup | chocolate shavings | for garnish and added decadence |
Preparation Methods
Creating a Crumb Crust: Crush cookies into fine crumbs using a food processor or by placing them in a zip-lock bag and rolling over with a rolling pin. This technique provides a firm yet tender base.
Layering: Carefully spread each layer evenly using a spatula. This ensures a smooth, even distribution that enhances both the visual appeal and texture of the dessert.
Whipping Cream Cheese: Beat cream cheese until fluffy before adding other ingredients. This step is crucial for a light and airy cream cheese layer that integrates smoothly with other elements.
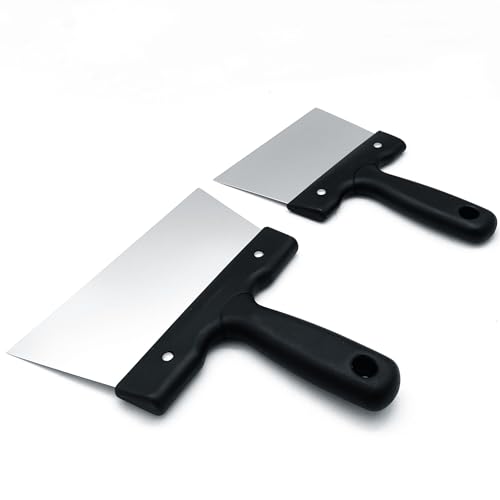
PREMIUM CONSTRUCTION: Set of 2 durable chocolate coating spatulas with stainless steel blades and ergonomic black handles for professional-quality dessert making VERSATILE...
Step 1: Prepare the Crust

Begin by crushing the Oreo cookies into fine crumbs using a food processor.
If you don't have a processor, place cookies in a zip-lock bag and crush with a rolling pin.
Mix the crumbs with melted butter until well combined.
Press the mixture firmly into the bottom of a springform pan to form the crust.
Step 2: Make the Chocolate Layer

In a large bowl, combine the instant chocolate pudding mix with milk.
Whisk vigorously until the mixture thickens and becomes smooth.
Allow the pudding to set for a few minutes to reach desired consistency.
Spread the chocolate layer evenly over the prepared crust.
Step 3: Prepare the Cream Cheese Layer

In another bowl, beat the softened cream cheese until light and fluffy.
Gradually add powdered sugar while continuing to beat until well blended.
Fold in the whipped topping gently to maintain a light texture.
Spread this cream cheese mixture over the chocolate layer evenly.
Step 4: Add the Whipped Topping

Spread the remaining whipped topping over the cream cheese layer.
Use a spatula to create an even and smooth top layer.
Ensure the whipped topping covers the entire surface for a neat appearance.
Gently tap the pan to settle the layers.
Step 5: Garnish with Chocolate Shavings
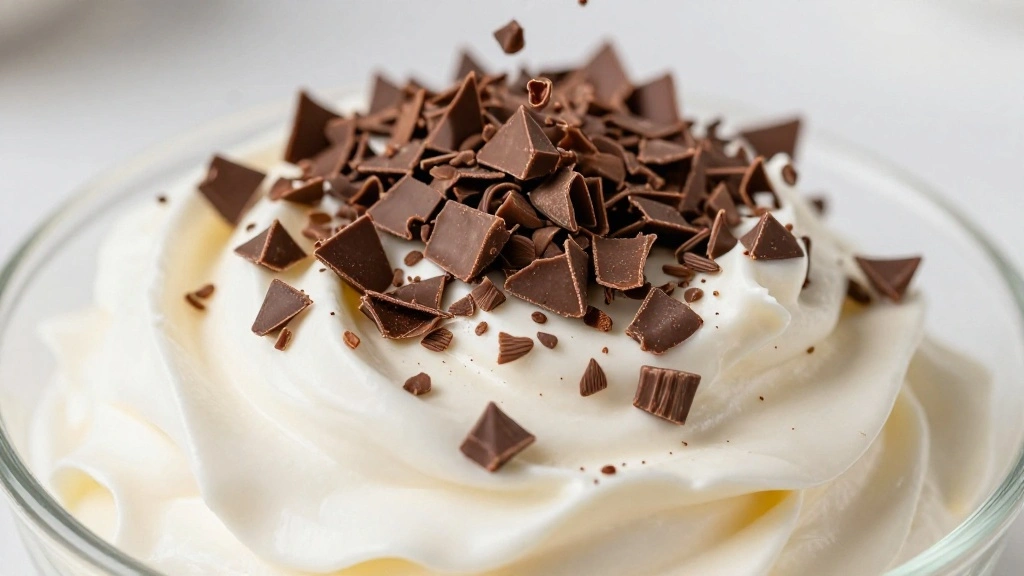
Sprinkle chocolate shavings evenly over the top of the whipped topping.
Use a vegetable peeler to create shavings from a chocolate bar if needed.
Ensure an even distribution for a balanced flavor in each bite.
Refrigerate the dessert for at least 2 hours to set.
Critical Timing and Temperature Guide
Setting the Dessert: Allow the assembled dessert to chill in the refrigerator for at least 2 hours. The cool temperature solidifies the layers, enhancing the texture and flavor. Avoid rushing this process as insufficient chilling can result in a runny dessert.
Mixing Ingredients: Ensure the cream cheese is at room temperature before mixing to achieve a smooth and creamy texture. Cold cream cheese will result in lumps and an uneven mixture.
Layer Assembly: When spreading layers, work quickly and efficiently to prevent ingredients from warming up and losing their structure.

NO LEAKS IN THE WATER BATH – The LEAKPROOF SILICONE SLEEVE is designed for watertight confidence. No need for foil wraps, evenly baked cheesecakes, no surface cracks....
Pro Tips for No-Bake Chocolate Lasagna
• Ingredient Selection: Choose high-quality chocolate pudding mix and real butter for the base to ensure a rich flavor and firm crust.
• Preparation Secret: Use a spatula dipped in warm water for spreading layers evenly, preventing sticking and tearing.
• Temperature Management: Keep ingredients like whipped topping and cream cheese chilled until just before use to maintain their structure.
• Texture Enhancement: For a firmer crust, allow the cookie crumb mixture to chill in the pan for 10 minutes before adding layers.
• Flavor Layering: Enhance the chocolate flavor by adding a pinch of espresso powder to the pudding mix.
• Make-Ahead Strategies: Prepare the dessert a day in advance and store it in the refrigerator, covered, to allow flavors to meld.
• Restaurant-Quality Finishing Touches: Add a dusting of cocoa powder or a drizzle of chocolate sauce before serving for an elegant presentation.
• Equipment Optimization: If you don't have a food processor, a sturdy bag and rolling pin work well for crushing cookies.
Troubleshooting Common Issues
• Layers Mixing: If layers mix while spreading, ensure each layer is set before adding the next. Refrigerate briefly between layers to firm them up.
• Crust Too Soft: Ensure the crust is well-pressed and chilled before adding layers. If it's still soft, consider adding a bit more melted butter.
• Runny Pudding: If the pudding is too runny, double-check the milk-to-pudding mix ratio and allow more time to set before layering.
• Grainy Cream Cheese Layer: Prevent this by beating the cream cheese until smooth before adding other ingredients.
• Uneven Layers: Use a level surface and check that the pan is flat. Spread each layer carefully and evenly.
• Chocolate Shavings Melting: Keep the chocolate bar chilled before shaving to achieve firm shavings that hold their shape.

SET OF TWO 8 x 4-INCH MEDIUM LOAF PANS: Great for baking meatloaf, sweet or savory breads, thick cakes or brownies, smaller portions of lasagnas or casseroles, and more for the perfect bake every time

INGENUITY DIAMOND TEXTURE - The cookie sheet pan set has a diamond texture on the base increases its non-stick properties and ensures even and quick heat airflow to the cookie, which makes the cookies consistently baked without any over or undercooked parts.

【MADE OF DURABLE PORCELAIN】A type of premium LEAD-FREE and NON-TOXIC ceramic that is anti-chip, scratch resistant, bright surface, and easy to clean and maintain, longer service life. Safe for dishwashers, refrigerators, microwaves, and ovens. Get the most out of your investment with our MALACASA casserole dishes
Variations and Regional Differences
• Italian-Style Variation: Incorporates mascarpone cheese in place of cream cheese for a richer, more authentic Italian flavor profile, often served with a dusting of cocoa powder.
• French-Inspired Version: Uses dark chocolate ganache in place of instant pudding for a more intense chocolate flavor and a luxurious texture.
• Mexican Twist: Adds a hint of cinnamon and chili powder to the chocolate layer for a spicy kick that complements the sweetness.
• Vegan Adaptation: Utilizes coconut cream and dairy-free pudding mix to create a plant-based version that retains the decadent flavor and texture.
• Gluten-Free Option: Substitutes gluten-free chocolate cookies for the crust and ensures all other ingredients are certified gluten-free.
Food Science Behind the Recipe
• Emulsification: The blending of cream cheese and whipped topping creates a stable emulsion, contributing to the smooth texture and maintaining the integrity of the layers.
• Gelatinization: Instant pudding mix relies on gelatinization of starches when mixed with milk, which thickens the mixture and allows it to set firmly.
• Fat Crystallization: The chocolate shavings benefit from controlled fat crystallization, which ensures they remain solid and add a pleasing texture.
• Aeration: Beating cream cheese and folding in whipped topping incorporates air, resulting in a light, airy texture that balances the denser layers.
Frequently Asked Questions
What's the most common mistake people make when preparing No-Bake Chocolate Lasagna? The most common mistake is not allowing enough time for the dessert to set properly in the refrigerator, leading to runny layers.
Can I make this dessert ahead of time? Yes, you can prepare it a day in advance and store it in the refrigerator, covered, to enhance the flavors.
What can I use if I don't have a springform pan? A regular baking dish can be used, but the presentation might not be as neat when serving.
How can I make this dessert vegan? Use coconut cream instead of dairy whipped topping and a dairy-free pudding mix to make it vegan-friendly.
Why is my cream cheese layer grainy? Graininess can occur if the cream cheese isn't softened properly before mixing. Ensure it's at room temperature for the best results.
Can I use homemade whipped cream instead of store-bought? Yes, homemade whipped cream can be used, but ensure it's stabilized to maintain the structure of the layers.
Is there a way to make this dessert gluten-free? Substitute gluten-free cookies for the crust and double-check all other ingredients for gluten-free certification.
Serving and Presentation Guide
• Traditional Presentation: Serve chilled slices of No-Bake Chocolate Lasagna on individual dessert plates, garnished with additional chocolate shavings.
• Modern Twist: Use a ring mold to create individual servings, layering directly into the mold for a polished, restaurant-style presentation.
• Family-Style Serving: Present the dessert in the springform pan at the table, allowing guests to serve themselves, creating a casual and communal dining experience.
• Elegant Finishing Touches: Add fresh berries or a drizzle of raspberry sauce for a pop of color and a complementary flavor contrast.
Conclusion
No-Bake Chocolate Lasagna is a perfect dessert to wow your guests with minimal effort.
Its rich layers and delicious flavors make it a standout on any dessert table.
Give this recipe a try and experience a taste of chocolate heaven.
You'll find it becomes a favorite go-to for both casual and special occasions.