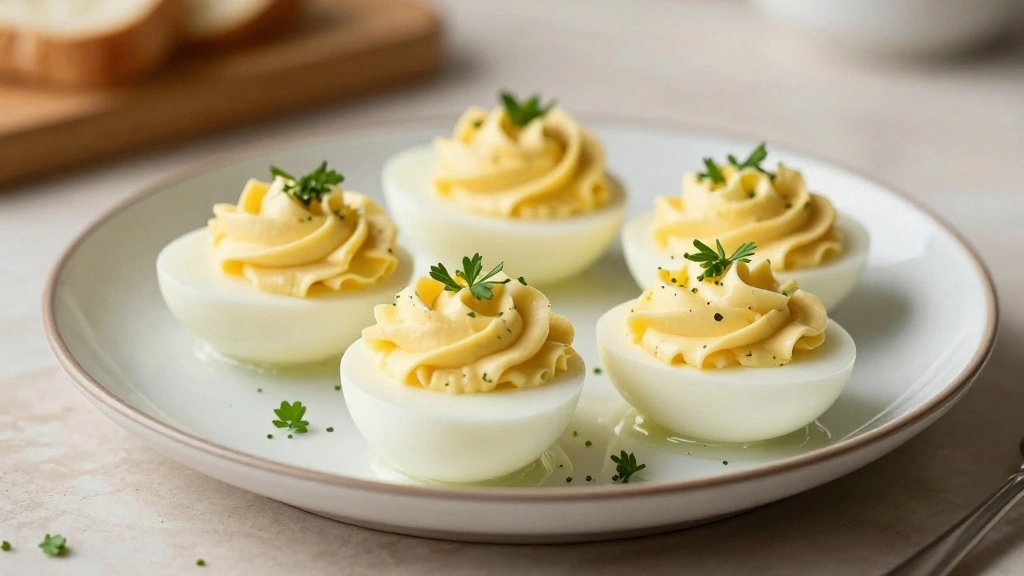
This classic Dill Deviled Eggs recipe brings together the fresh, aromatic herb of dill with creamy, tangy filling to create a delightful appetizer.
The harmonious balance of dill and eggs provides a refreshing twist on a traditional favorite that will have everyone asking for your secret.
I discovered this recipe during a spring garden party, where the zesty dill complemented the blossoming season perfectly.
Whether you’re preparing a casual family brunch or hosting an elegant dinner, these dill deviled eggs deliver impressive results with straightforward preparation.
The History and Cultural Significance
• Dill Deviled Eggs traces its origins to ancient Rome, where it was originally created as a luxurious dish for the wealthy.
• The dish evolved over decades as spices became more accessible, eventually becoming the beloved version we know today.
• In American culture, this dish traditionally appears at Easter gatherings, symbolizing new beginnings and rebirth.
• While many variations exist across different regions, the authentic version maintains a creamy, slightly tangy filling that sets it apart from imitations.
Recipe Overview
Nutritional Information (per serving)
Essential Equipment Guide
Mixing Bowl: A sturdy mixing bowl is essential for combining ingredients thoroughly to achieve a smooth filling. Alternatives like a glass or ceramic bowl work well, but ensure it’s large enough for easy mixing.
Piping Bag: A piping bag allows for neat and precise filling of the egg whites, creating a professional appearance. If unavailable, a small spoon or a plastic bag with the corner snipped off can substitute.
Potato Masher: Using a potato masher helps achieve a perfectly smooth egg yolk mixture. A fork can be used as an alternative, though it may not yield as smooth of a consistency.
Ingredients
For the Base
|
| Amount | Ingredient | Notes |
|---|---|---|
| 6 large | eggs | hard-boiled and peeled |
For the Filling
| Amount | Ingredient | Notes |
|---|---|---|
| 3 tablespoons | mayonnaise | adds creaminess |
| 1 teaspoon | Dijon mustard | adds tang |
| 1 teaspoon | white vinegar | provides acidity |
| 1 tablespoon | fresh dill | finely chopped, adds freshness |
| 1 pinch | salt | enhances flavor |
| 1 pinch | pepper | adds subtle heat |
Preparation Methods
Hard-Boiling Eggs: Begin with cold water and bring it to a boil, then let the eggs sit off-heat for a precise time to ensure perfectly cooked yolks without a gray ring. Mastering this technique ensures tender whites and creamy yolks.
Egg Yolk Mashing: Use a potato masher or fork to break down yolks until they are completely smooth, which is crucial for a velvety filling. Consistency is key.
Piping the Filling: Use a piping bag to fill egg whites with the yolk mixture smoothly and evenly. Practice makes perfect for a professional look.
Step 1: Prepare Ingredients

Gather all ingredients and equipment.
Ensure eggs are hard-boiled and peeled.
Have fresh dill washed and ready.
Set up a clean work area for efficient preparation.
Step 2: Hard-Boil the Eggs

Place eggs in a single layer in a pot and cover with cold water.
Bring the water to a rolling boil over medium heat.
Remove from heat and cover for 10 minutes.
Transfer eggs to an ice bath to stop cooking.
Step 3: Peel the Eggs

Carefully crack the shells of the eggs once cooled.
Peel under running water to remove shells easily.
Ensure no shell fragments remain on the eggs.
Dry peeled eggs with a paper towel.
Step 4: Halve the Eggs

Slice each egg in half lengthwise with a sharp knife.
Gently remove the yolks and place them in a mixing bowl.
Arrange egg whites on a serving platter.
Ensure yolks are intact and ready for mashing.
Step 5: Mash the Egg Yolks

Use a potato masher to break down the yolks.
Mash until they reach a smooth consistency.
Avoid leaving any lumps for a creamy filling.
Transfer mashed yolks to a larger mixing bowl.
Step 6: Prepare the Filling

Add mayonnaise, mustard, vinegar, dill, salt, and pepper to yolks.
Mix thoroughly until well combined.
Taste and adjust seasonings as needed.
Ensure a smooth, creamy consistency.
Step 7: Fill the Egg Whites

Transfer yolk mixture to a piping bag.
Pipe the filling into the egg white halves neatly.
Ensure each egg is evenly filled.
Use a spoon for any touch-ups if necessary.
Step 8: Garnish and Serve

Sprinkle finished eggs with a pinch of paprika.
Add a small dill sprig for garnish on each egg.
Arrange neatly on a serving platter for presentation.
Serve chilled or at room temperature.
Critical Timing and Temperature Guide
Boiling Eggs: 10 minutes off-heat after boiling, with a visual indicator of solid whites and bright yellow yolks. Avoid overcooking to prevent gray yolks.
Filling Preparation: Mix ingredients until smooth, paying attention to consistency. Overmixing can lead to a broken texture.
Chilling: Allow eggs to chill for at least 20 minutes before serving for the best flavor integration. Avoid serving too soon to prevent a runny filling.
Pro Tips for Dill Deviled Eggs
• Ingredient Selection: Choose farm-fresh eggs and aromatic, fresh dill for the best flavor impact.
• Preparation Secret: Let the eggs sit in an ice bath after boiling to ensure easy peeling and perfectly smooth whites.
• Temperature Management: Use room temperature ingredients for a more cohesive filling.
• Texture Enhancement: Ensure yolks are thoroughly mashed for a silky smooth filling that distinguishes great deviled eggs.
• Flavor Layering: Incorporate a touch of white vinegar to enhance the tanginess of mustard and complexity of dill.
• Make-Ahead Strategies: Prepare the filling a day in advance and store in the fridge, filling eggs just before serving.
• Restaurant-Quality Finishing Touches: Use a star tip on your piping bag for an elegant appearance.
• Equipment Optimization: A hand mixer can speed up the mixing process and ensure even consistency.
Troubleshooting Common Issues
• Texture Too Dense: Overmixing or not enough mayo can cause this. Add more mayo and gently fold to correct.
• Filling Too Runny: Too much liquid in the mixture can cause this. Add more yolk or a bit of mashed potato to thicken.
• Egg Whites Torn: Overcooked or under-chilled eggs can cause tearing. Ensure proper cooking and cooling times.
• Flavors Unbalanced: If the filling is too tangy or bland, adjust with small increments of salt or sugar to balance.
• Yolks with Green Ring: Overcooking eggs can result in a green ring. Use precise timing and an ice bath to avoid this.
• Filling Unevenly Distributed: Practice piping or use a spoon to ensure even filling in each egg half.
Variations and Regional Differences
• Southern Style: This version adds a touch of sweet relish and a dash of hot sauce for a Southern flair.
• French-Inspired: Incorporates crème fraîche and chives for a rich, sophisticated twist.
• Greek Variation: Adds feta cheese and black olives for a Mediterranean flavor profile.
• Asian Fusion: Uses wasabi paste and soy sauce for an exciting, spicy variation.
Food Science Behind the Recipe
• Emulsification: The combination of egg yolks and mayonnaise forms a stable emulsion, resulting in a creamy texture.
• Protein Coagulation: Proper cooking of the egg whites ensures they set correctly without becoming rubbery.
• Flavor Volatility: Fresh dill and mustard provide volatile compounds that enhance aroma and flavor when freshly prepared.
Frequently Asked Questions
What's the most common mistake people make when preparing Dill Deviled Eggs? Overcooking the eggs, leading to a green ring around the yolk and a sulfuric taste.
Can I use dried dill instead of fresh? Fresh dill is recommended for its vibrant flavor, but dried can be used in a pinch with less quantity.
How can I make the filling smoother? Ensure yolks are completely mashed and use a hand mixer for the smoothest filling.
What's the best way to transport deviled eggs? Use a specially designed deviled egg carrier or line a tray with lettuce leaves to prevent sliding.
How do I store leftover deviled eggs? Store in an airtight container in the fridge for up to two days for best freshness.
Can I make these eggs ahead of time? Yes, prepare the filling in advance and fill the egg whites just before serving for optimal freshness.
What can I do if I don't have a piping bag? Use a plastic sandwich bag with a small corner cut off as a substitute for a piping bag.
Serving and Presentation Guide
• Traditional Presentation: Arrange eggs in a circular pattern on a platter, garnished with dill sprigs and paprika.
• Modern Style: Serve on a slate board with microgreens for a contemporary touch.
• Casual Gathering: Present on a rustic wooden board lined with leafy greens for a homey feel.
• Elegant Plating: Use a tiered serving tray for a sophisticated, layered presentation.
Conclusion
These Dill Deviled Eggs are a refreshing twist on a classic appetizer that will delight your guests.
With a perfect balance of flavors and creamy texture, they're sure to become a favorite at your gatherings.
Try this recipe today and enjoy the compliments from family and friends!