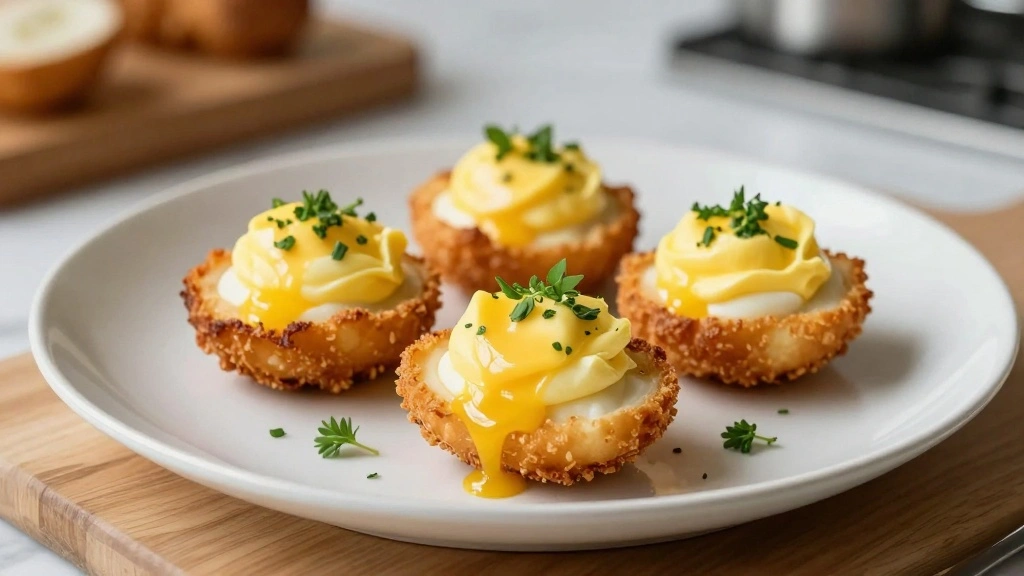
Fried Deviled Eggs with a crispy twist is a delightful transformation of a traditional favorite.
Imagine the classic creamy and tangy filling of deviled eggs encased in a golden, crunchy shell.
This recipe captures the essence of comfort food while introducing an exciting texture contrast.
Perfect for gatherings, this dish offers a fun yet sophisticated appetizer option.
The combination of flavors and textures is sure to impress your guests and leave them craving more.
The History and Cultural Significance
• Fried Deviled Eggs traces its origins to Southern United States, where it was originally created by home cooks looking for a new spin on a picnic classic.
• The dish evolved over decades as cooks experimented with deep frying techniques, eventually becoming the beloved version we know today.
• In Southern culture, this dish traditionally appears at family gatherings and potlucks, symbolizing hospitality and creativity.
• While many variations exist across different regions, the authentic version maintains a creamy filling and a crunchy coating that sets it apart from imitations.
Recipe Overview
Nutritional Information (per serving)
Essential Equipment Guide
Deep Fryer: Essential for achieving a consistent golden crust, a deep fryer allows for precise temperature control, ensuring even cooking. Alternatives include a heavy-bottomed pot with a thermometer.
Slotted Spoon: This tool is crucial for safely removing the eggs from hot oil while allowing excess oil to drain. A spider skimmer can also be used for this purpose.
Mixing Bowl: A medium-sized mixing bowl is needed for blending the filling ingredients smoothly. A hand mixer can also be used for a creamier texture.
Ingredients
For the Eggs
|
| Amount | Ingredient | Notes |
|---|---|---|
| 6 large | eggs | hard-boiled and peeled |
For the Coating
| Amount | Ingredient | Notes |
|---|---|---|
| 1 cup | all-purpose flour | for dredging |
| 2 large | eggs | beaten, for coating |
| 1 cup | panko breadcrumbs | for extra crunch |
For the Filling
| Amount | Ingredient | Notes |
|---|---|---|
| 3 tablespoons | mayonnaise | adds creaminess |
| 1 tablespoon | Dijon mustard | for tangy flavor |
| 1 teaspoon | white vinegar | enhances flavor |
| 1 teaspoon | hot sauce | adds a spicy kick |
Seasonings
| Amount | Ingredient | Notes |
|---|---|---|
| 1 teaspoon | paprika | for color and flavor |
| 1 teaspoon | salt | enhances flavor |
| 1/2 teaspoon | black pepper | adds heat |
Preparation Methods
Hard-Boiling Eggs: This technique involves boiling eggs to firmness without overcooking. It's essential for easy peeling and perfect texture. Start with cold water, bring to a boil, then let them sit covered for 10 minutes before cooling in ice water.
Breading Technique: Dredging the eggs first in flour, then egg, and finally breadcrumbs ensures a crispy shell. It's crucial to cover evenly for the best results, pressing the breadcrumbs gently into the egg surface.
Filling Piping: Using a piping bag allows for a neat and attractive presentation of the egg filling. Squeeze gently and steadily to fill the egg whites without overfilling.
Step 1: Prepare Ingredients

Gather all necessary ingredients and equipment.
Ensure that eggs are hard-boiled, peeled, and cooled.
Measure out flour, panko, and other ingredients.
Set up a breading station with separate bowls for flour, beaten eggs, and breadcrumbs.
Step 2: Slice and Scoop Eggs

Carefully slice each hard-boiled egg in half lengthwise.
Use a spoon to gently remove the yolks, placing them in a mixing bowl.
Set the egg whites aside on a tray.
Ensure yolk removal is clean to maintain the shape of the egg whites.
Step 3: Prepare the Filling

In the mixing bowl with yolks, add mayonnaise, Dijon mustard, vinegar, and hot sauce.
Mix until smooth and creamy, adjusting seasoning as needed.
Taste for balance of flavors, adding more mustard or hot sauce if desired.
Ensure the filling is lump-free for easy piping.
Step 4: Fill the Egg Whites

Transfer the yolk mixture to a piping bag fitted with a star tip.
Pipe the filling into the hollows of the egg whites in a decorative swirl.
Fill each egg half generously but without overflowing.
Ensure even distribution of filling among all egg halves.
Step 5: Bread the Eggs

Dredge each filled egg half in flour, shaking off excess.
Dip the floured egg into beaten eggs, allowing excess to drip off.
Press the egg into panko breadcrumbs, ensuring full coverage.
Repeat process for all egg halves, ensuring even coating.
Step 6: Heat the Oil

Preheat your deep fryer or a heavy-bottomed pot filled with oil to 350°F (175°C).
Use a thermometer to maintain consistent temperature.
Ensure oil is hot enough for frying to avoid sogginess.
Adjust heat as necessary during the cooking process.
Step 7: Fry the Eggs

Carefully lower breaded eggs into the hot oil using a slotted spoon.
Fry in batches to avoid overcrowding.
Cook until golden brown and crispy, about 2-3 minutes.
Remove and drain on paper towels to remove excess oil.
Step 8: Serve and Garnish

Arrange fried deviled eggs on a serving platter.
Garnish with a sprinkle of paprika and fresh herbs.
Serve immediately while still warm and crispy.
Enjoy the blend of creamy, tangy, and crunchy flavors.
Critical Timing and Temperature Guide
Hard-Boiling Eggs: Boil for exactly 10 minutes, then transfer to an ice bath to stop cooking. Overcooking leads to a green ring around yolks.
Frying: Maintain oil at 350°F (175°C). Fry for 2-3 minutes until golden brown. Overcrowding the pot lowers oil temperature, resulting in soggy eggs.
Serving Temperature: Serve immediately at room temperature. Cold eggs lose their crispy texture and vibrant flavor.
Pro Tips for Fried Deviled Eggs
• Ingredient Selection: Choose fresh, high-quality eggs for the best texture and flavor. Fresh panko breadcrumbs add superior crunch.
• Preparation Secret: Chill hard-boiled eggs in ice water for easy peeling and perfect shape.
• Temperature Management: Use a thermometer to ensure oil stays at 350°F, preventing greasy eggs.
• Texture Enhancement: Double-coat with panko for an extra-crispy crust that stays crisp longer.
• Flavor Layering: Balance the tanginess of mustard with a hint of hot sauce for depth of flavor.
• Make-Ahead Strategies: Prepare filling and hard-boil eggs a day ahead. Store separately to assemble and fry fresh.
• Restaurant-Quality Finishing Touches: Use a piping bag for the filling to achieve a professional presentation.
• Equipment Optimization: If a deep fryer isn't available, use a cast-iron skillet for even heat distribution.
Troubleshooting Common Issues
• Eggs Overcooked: Resulting in rubbery texture. Ensure proper boiling time and rapid cooling in ice water.
• Breading Falling Off: Caused by insufficient coating. Press breadcrumbs firmly and ensure even coverage.
• Oil Temperature Too Low: Leads to greasy eggs. Use a thermometer for accurate heat control.
• Filling Too Runny: Results from excess liquid. Adjust with more yolk or reduce mayonnaise.
• Uneven Frying: Caused by overcrowding. Fry in small batches for even cooking.
• Lack of Flavor: Due to under-seasoning. Adjust salt and spices in filling to taste.
Variations and Regional Differences
• Cajun Style: Incorporates Cajun spices like cayenne and paprika into the filling for a spicy kick, reflecting Southern culinary influences.
• Asian Fusion: Uses soy sauce and sesame oil in the filling, with a sprinkle of black sesame seeds, offering a unique East-meets-West flavor profile.
• Italian Twist: Infuses the filling with pesto and tops with grated Parmesan for a Mediterranean flair.
• Tex-Mex Variation: Adds chopped jalapeños and cilantro to the filling, served with a side of salsa for dipping.
Food Science Behind the Recipe
• Emulsification: The creamy filling relies on emulsification of the yolk, mayonnaise, and mustard, creating a stable, smooth texture.
• Maillard Reaction: Frying the eggs triggers this reaction, enhancing flavor and creating a golden, crispy crust.
• Protein Denaturation: Boiling eggs causes protein denaturation, contributing to the firmness of the egg whites and setting the yolks.
Frequently Asked Questions
What's the most common mistake people make when preparing Fried Deviled Eggs? Overcrowding the frying pot, which lowers the oil temperature and leads to sogginess.
Can I make Fried Deviled Eggs in advance? Prepare components separately and assemble just before frying for best results.
How can I ensure my breading stays on? Use a proper dredging process and press breadcrumbs firmly onto the eggs.
What oil is best for frying? Use a neutral oil with a high smoke point, like canola or vegetable oil.
How do I prevent the filling from being too runny? Adjust the ratio of wet to dry ingredients by adding more yolks or reducing liquid components.
Why are my eggs rubbery? Overcooking during boiling or frying can lead to a rubbery texture.
What's the best way to serve Fried Deviled Eggs? Serve immediately after frying for optimal crispiness and flavor.
Can I use an air fryer for this recipe? Yes, but adjust the cooking time and temperature as needed for optimal results.
Serving and Presentation Guide
• Traditional Presentation: Arrange in a circular pattern on a platter, garnished with parsley and paprika.
• Modern Plating: Serve individually on small plates with microgreens and a drizzle of hot sauce for a contemporary look.
• Casual Setting: Serve in a shallow basket lined with parchment paper for a picnic-style presentation.
• Buffet Arrangement: Arrange in rows on a long serving tray for easy self-service at parties.
Conclusion
With its blend of creamy filling and crispy coating, Fried Deviled Eggs offer a delightful twist on a classic favorite.
This recipe is sure to impress guests with its unique texture and flavor profile.
Try this dish for your next gathering and enjoy the compliments that come your way.